Google Drive is a powerful tool for storing and sharing files online, whether you're working on a project, organizing personal documents, or collaborating with others. But not every file needs to be edited by everyone. Sometimes, you just want to share a folder so others can view the contents without being able to change anything. That’s where view-only access comes in handy.
You can restrict any external user from editing your Google Drive document before sharing it for team activities or collaborations. To prevent accidental changes, you can also set the document to view-only mode for everyone, including yourself.
Let's learn both methods to make our documents and files more secure and safe from any kind of accidental editing.
Share Google Drive Documents With View-Only Access.
Step 1: Open Google Drive.
To begin, open your preferred web browser and go to https://drive.google.com. If you're not already signed in, you’ll be prompted to log in to your Google account. Once signed in, you'll land on the Google Drive homepage, where all your stored files and folders are displayed.
Step 2: Locate the Document You Want to Share
Scroll through your list of files, or use the search bar at the top to quickly find the document you intend to share. Once you locate it, you can either right-click on the file and select “Share” or open the document first and then click the “Share” button located in the top-right corner of the screen.
Step 3: Share with Specific People as Viewers
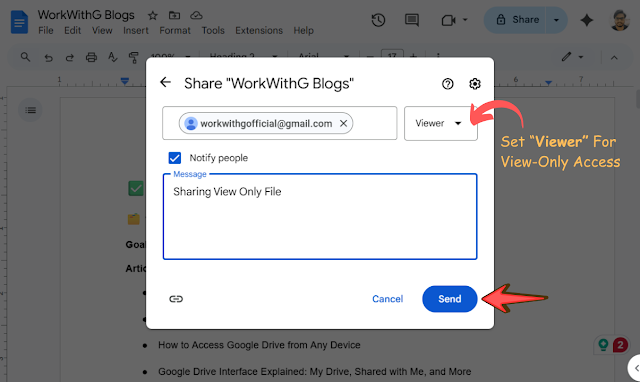
In the sharing dialog box that appears, you will see a field labeled “Add people and groups.” Type the email address of the person or group you want to share the document with. After entering the email, a drop-down menu will appear where you can select their permission level.
Choose “Viewer” to ensure they can only view the document, but cannot comment on or edit it. Once done, click the “Send” button to share the document with them.
Step 4: Share via a View-Only Link (Optional)
If you prefer to share the document via a link rather than individual email addresses, look toward the bottom of the sharing dialog box. Under “General access”, click the dropdown that may say “Restricted” by default. Change it to “Anyone with the link”.
Once you do that, another dropdown will appear beside it—make sure it is set to “Viewer.” Then click “Copy link” to copy the shareable URL and send it via email, chat, or wherever needed.
Alternative way to Set Everyone's Role To view-only access.
Change Editing To View-Only Access in Google Docs.
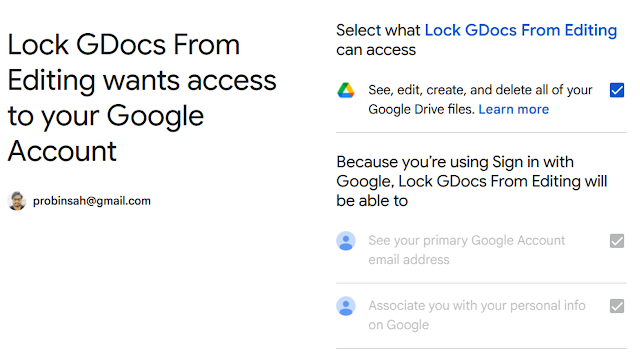
Changing Google Drive Document Permission Using Google App Script.
function restrictEditingToViewOnly() {
  var fileId = 'YOUR_FILE_ID_HERE'; // Replace with your actual fileID
  var file = DriveApp.getFileById(fileId);

  var editors = file.getEditors();

  for (var i = 0; i < editors.length; i++) {
    var userEmail = editors[i].getEmail();
    file.removeEditor(userEmail);
    file.addViewer(userEmail);
    Logger.log("Changed " + userEmail + " to viewer.");
  }

  var myEmail = Session.getActiveUser().getEmail();
  if (myEmail !== file.getOwner().getEmail()) {
    file.removeEditor(myEmail);
    file.addViewer(myEmail);
    Logger.log("You (" + myEmail + ") are now a viewer.");
  } else {
    Logger.log("You are the owner transferring ownership manually if needed.");
  }
}
https://docs.google.com/document/d/1XiYBcFw4VTHOmaD1pMmMTNlt2btERcxe0us3pHR4D4tNs/edit?usp=sharing


.png)


 Latest Google News, Updates, and Features. Everything You Need to Know About Google
No comments
Post a Comment